Monday, February 29, 2016

Steampunk Bird House by Mary

It's almost spring so you know what that means. It's time for my yearly steampunk project!
The house was covered with different sizes of squares of 3M foil tape. These pieces were placed  over the surface of the birdhouse. Using a stylus, I made an impression in the foil to create a rivet look. Black acrylic paint was applied over the foil and then buffed off when almost dried.  The gears you see on the front were painted with acrylic paint. The ones under the flowers were glossed  with clear liquid embossing fluid. Glitter in sliver and clear was applied to the gear acting as the opening into the birdhouse.
You can see on the next two pictures that I had applied different sized gears to the back and both sides before applying the the tape. The clock hand was embossed with black embossing powder.
Thanks for checking out the blog today! Make sure you stop back tomorrow for information on our Facebook group challenge for the month of March!

Gypsy Soul Laser Cuts Products Used:
Gears Shape Set
Clock Hands Shape Set

Sunday, February 28, 2016

Elegant Keepsake Box

Hello friends!  Debbie with you today sharing a project that I have fallen in love with!  I love sharing these boxes around my house, it never fails someone picks them up and takes a peek inside.  This one happens to have photos of my father who passed away several years ago now. They come in three different sizes which makes it even better!


The box itself is a book and one of my favorite Gypsy Soul Laser Cuts products. They can be altered for any occasion, weddings,baby's, birthdays and special occasion.

To alter this box I simply covered it with patterned paper and then decorated it with a hand made flower spray,butterflies and doily's.

If you're looking for something to give as a gift this would make a perfect gift!

Thanks for stopping By Gypsy Soul Laser Cuts today!

Debbie

Gypsy Soul Laser Cuts Products Used:
Book Box Small (special  order )

Saturday, February 27, 2016

Dragonflies by Shanna

Can I say how much I love nature when it is flying on me, around me, or in my face??? It is bad that I am a screaming mess when one hits me in the face or flies by my ear real loud! 

But I still think nature is beautiful and with Spring right around the corner I couldn't resist starting some pieces that are bright and happy and remind me of what is coming. 


So I created these to tags with he dragonflies as my main focus. I love these fancy dragonflies. 


Here you can see the detail int he wings. I love the swirls so much and was so happy when the paint didn't get stuck in them. I love the laser cut because the detail is just amazing!


The second tag I used a different dragonfly. I just love the fact that is reminds me a little of swiss cheese :). Silly I know but I love this one just as much. 


With spring and summer around the corner, make sure you check out the fabulous chipboard pieces for your crafty creations!
Items Used:

Friday, February 26, 2016

Witch Hazels Wagon of Wares


Hey guys, Jess here and this week I'm bringing you a whole lot of magic in a very tiny project.

Inspired by the poetic story The Goblin Market, I set out to create a cart for a miniature magical being to sell her wares. I designed this cart with two shelves, to maximize the amount of goodies I could include.

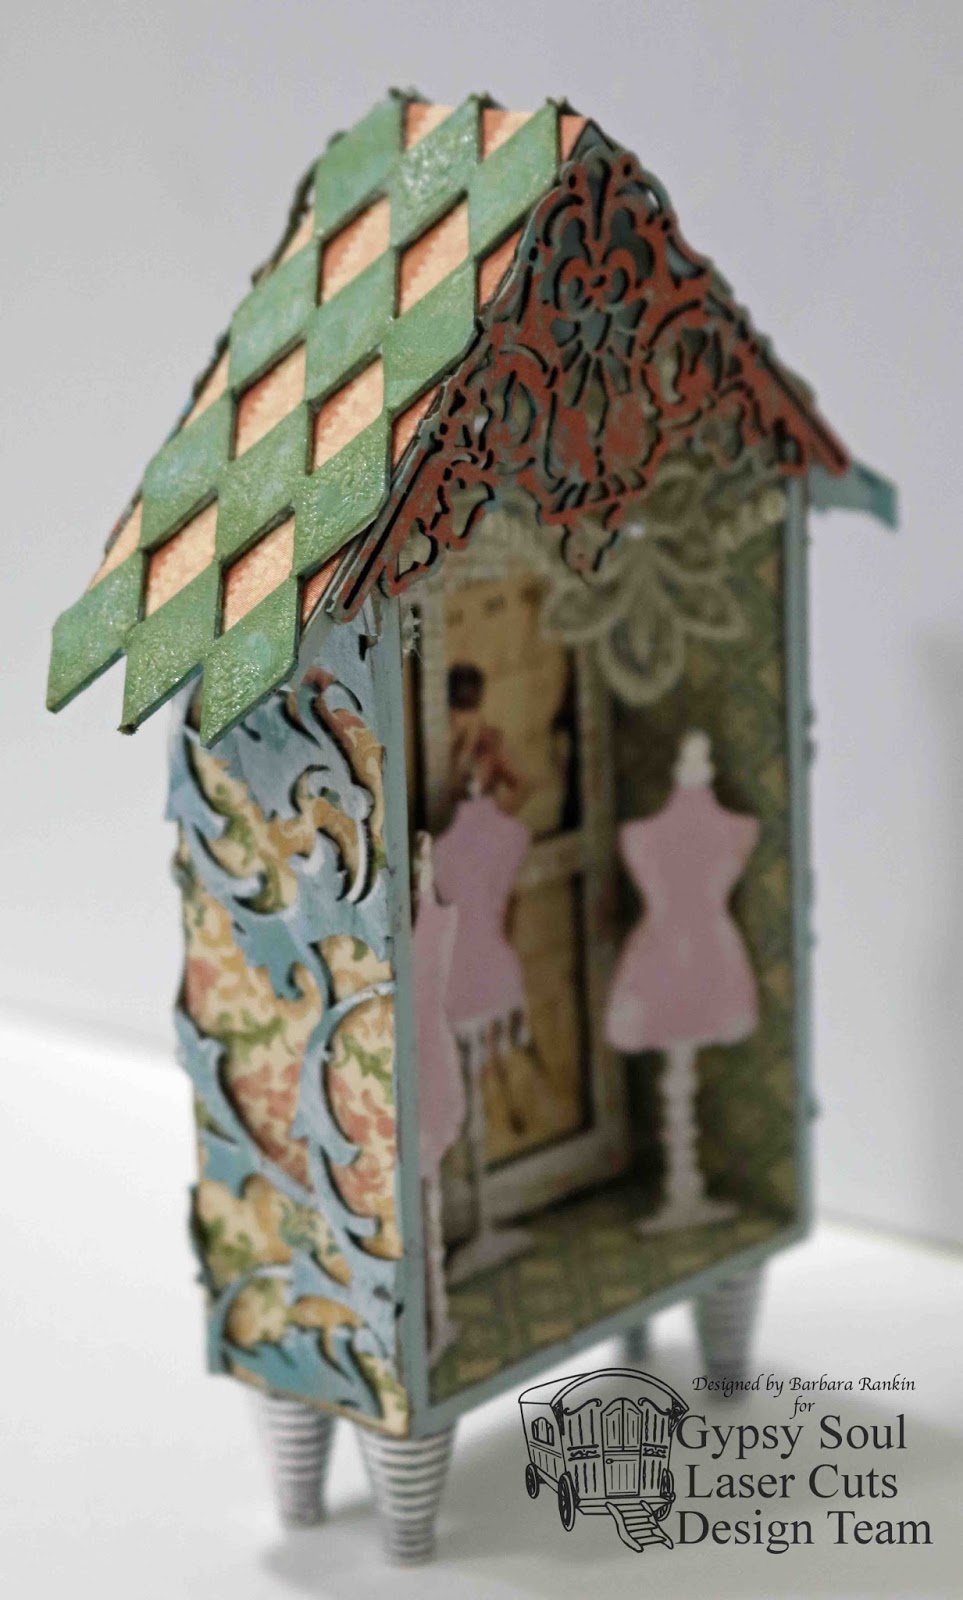
I have a slight addiction to these shingle strips from GSLC, as you can see here. It's so much easier than cutting them out by hand, I can tell you! You'll also see the bits of moss that have "formed" on the roof.
 The last customer who didn't pay their bill, perhaps? And Witch Hazels scroll for keeping tabs on what she needs to order.

 
 This side of the cart is packed with a couple of books and a pile of spell scrolls. If you've got the coin or things worth trading, these spell scrolls are gleaming with magic.


The other side of the cart is stacked with books, grimoires, and ancient knowledge. Close-up of the books and the Victorian corners detailing. I swear you can use these corners for anything!

Werewolf fangs, bat breath and a miriad of other disgusting spell components and reagents line the top shelf of her cart.
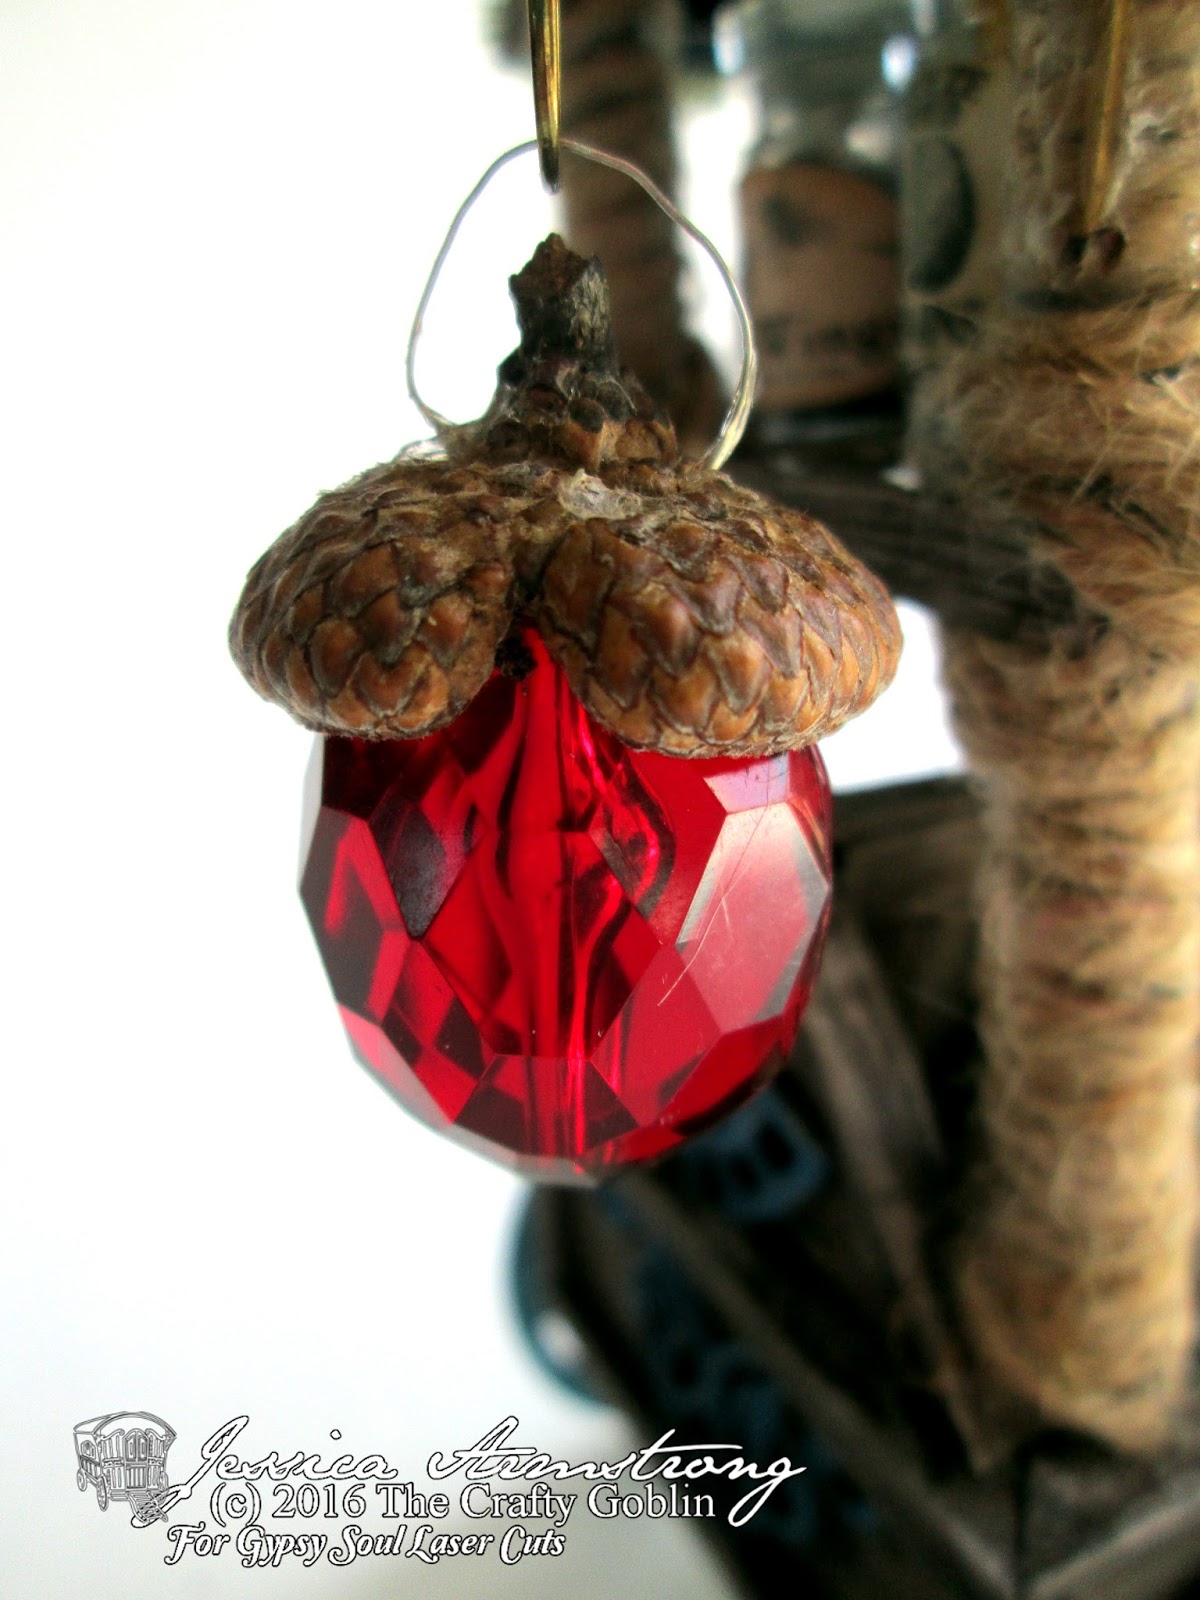
"Glownuts" are acorns that shine bright as lights in the darkness. This witch has harnessed one of these hard to find beauties as a lantern for her cart. 

The back of the cart, showcasing yet again the lovely Victorian corners from GSLC.

Materials List:
Victorian Corners 1
Victorian Corners 2
Wheels 2 Inch Straight
Shingle Strips (Coming Soon!)
---
Acorn top
Bead
Glass bottles
Miniature books
Miniature scrolls
Wooden Coffee Stir Sticks
Matte board

Thursday, February 25, 2016

La Mode Shoppe

Hey chipper gang!  Barbara here, and I have another one of those cute little mini house shaped shadow boxes from Gypsy Soul.  These are so fun to put together and decorate with your favorite theme.  I find them very inspirational to sit somewhere prominent for me to ponder.  If you missed my previous post using one of these cuties, you can click here to see that project.  But I warn you, it can be very addicting.   


I always lay my chipboard out the way it will be glued together, just to make sure I have it positioned  correctly.  I am using Mini House Shadowbox 1 for today's project.  This particular box is a taller, rectangular house, and I thought it would be perfect to house my dress forms and perhaps showcase the Fashionistas.  As always, I like to use Aleene's Fast Grab tacky glue to put my chipboard together. 


I traced the box onto the flourish texture sheet and cut the approximate area needed to cover the back and sides of the box.  I cut a section from the diamond texture sheet for the roof.
Next, I cut out all the pieces of paper to use on the inside, outside, and roof of the box.
Paint the inside and outside of the box with chalk paint in matching colors.  Allow paint to dry thoroughly, then adhere papers, as shown.


Paint diamonds, fourishes, and corners with the chalk paints in a green and blue. 


Add crackle glaze over the diamonds and add green distress ink over it.


Add white antiquing cream over the flourishes.


Wrap flourished texture sheet around box and adhering as you fold over the edges and trim excess.  Glue diamond texture sheet to roof.


Add a copper paste over the corners to resemble patinated copper.


Glue one corner to the front and one to the back.


Use the medium sized window from the Windows 4 Panel pack to select the images from the G45 Ladies' Diary paper to appear through the open window.  Trace around it with a pencil and cut out.  Set paper aside for now.  Paint the window frame with a coat of white crackle paint.  When dry, add brown distress stain to bring out the crackles, then adhere over the G45 image. 


Glue the window frame on the inside of the box.  Now it looks like there are two very fashionable ladies standing outside the shoppe, deciding whether or not to go in .  

Paint three miniature dress forms with a pink chalk paint and add white antiquing cream to give it a shabby chic look.  Adhere inside the box, as shown.


Paint a miniature bookplate with the pink chalk paint, adding white antiquing cream around the edges and a line of minature pearls.  Computer generate La Mode Shoppe (The Fashion Shoppe) onto a scrap of print paper and place in the center of the bookplate.  Adhere to back of box.


Glue four cone-shaped metal beads to the bottom  for legs.  A scrap piece lace was glued inside the box, just above the window, to represent  a window valance.  Pretty posh, huh?


And a here are a couple of side views.  I just love those texture sheets. They really add to the piece, giving such cool texture, don't you think? 


Supplies used:

Mini House Shadowbox 1
Windows 4 Panel
Art Deco Corner Set
Dressforms 1 Miniature Shape Set
Texture Sheet Flourished
Texture Sheet Diamonds
Miniature Bookplates Shape Set
Graphic 45 Ladies' Diary 8x8 paper pad
Chalk Paint
White crackle paint
Clear crackle glaze
White antiquing cream
Distress inks
Pearls
Lace

I hope you are enjoying my "series" of mini house shrines.  I've got two more to go, so I hope you will come back and check out my next one.  I don't know what I am going to do yet, but I hope to inspire you, nonetheless.

Thanks for stopping by, and be sure to visit my very talented team mate, Ginny, as she also has a post on today's blog.  

Have a wonderful and creative weekend!!

Barbara

Sweet Shabby Chic Wall Hanging with Tutorial

Hey there Peeps! Ginny here and I'm dropping in to share a very shabby chic inspired wall hanging I created with the gorgeous Gypsy Soul Laser Cut chippies.

First here's a look at the finished project....


Okay here's all the steps to creating this Sweet Wall Hanging....
Give the chippies a nice base with a white gel pen.

Next use Spectrum Noir Markers to add color and highlights to leaves.
Add a layer of patterned paper to a canvas covered chipboard base.

Layer on a few vintage postcard images.
Top off with GSL Cardstock Doily.
Add a circle of coordinating patterned paper to the center of the doily.
Attach loopy bows and a generous amount of chevron striped ribbon to the top to hang.
Adhere the prepared Scribble Frame Birds to the center creating a border around the patterned paper.
Add prepared Leafy Corners to the top and bottom framing the postcard images.
Arrange some shabby chic inspired flowers to the bottom of the frame.
Top of bows and floral arrangement with vintage buttons and burlap string bows.
Another look at the finished project.   I think it's very Springy : )

Okay that's all for me.....don't forget to check out my sweet friend Barbra's post. Her project is too awesome! Wishing you all a happy and productive day with lots of time to be creative : ) G